Introduction
Have you ever stood in front of the mirror, lipstick in hand, and wondered, “Is there more to this?” Or, have you ever looked at a magazine cover and marveled at how models attain such flawless, full lips? Well, wonder no more! You’re about to discover that with the right lip makeup steps, your pout can go from pretty to stunning.
The right lip makeup steps can transform your entire look, boosting your confidence and highlighting your natural beauty. It’s not just a swipe of lipstick; it’s an art. So, let’s dive into the world of lip artistry, today, which will not only enhance your natural beauty but also give you that confidence boost that comes with the natural charm of your lips knowing your pout is on point. So, grab your favorite lip products, and let’s get started on this beauty adventure!
What Do You Need Before Applying Lip Makeup
Applying lip makeup like a pro isn’t just about having the right shades of lipstick. It’s an art that requires precision, the right tools, and an understanding of your natural features. Whether you’re a makeup enthusiast or a professional artist, having a well-prepared lip makeup kit is essential. Here’s a comprehensive guide to what you need before you start creating those perfect pouts:
1 – Understanding Your Lips
Recognizing your lips’ uniqueness before applying makeup is key; different shapes require specific techniques—whether to plump or define, the right approach highlights their natural beauty, creating a harmonious look.
2 – Shade Selection
Understand your skin’s undertone to select lip shades that complement your complexion. The right colors can upgrade your natural beauty, whether you have a cool, warm, or neutral undertone.
3 – Exfoliator
A lip exfoliator is useful for removing dead skin and smoothing out the lip surface. This step is crucial if you’re going for a matte lipstick, as any flakiness can be more noticeable.
4 – Lip Balm
Lip Balm is the foundation of any great lip makeup application, as it prevents your lips from drying out and creates a smooth canvas for the rest of your products.
5 – Lip Primer
Lip Primer is the foundation for your lip color, providing a smooth canvas that ensures your lipstick adheres better and lasts longer is your best friend.
6 – Lip Liner
A high-quality Lip Liner is crucial for defining the shape of your lips and ensuring your lipstick doesn’t bleed. Choose a range of shades to match different lipstick colors and preferences.
7 – Lipstick
No lip makeup kit is complete without a variety of Lipstick formulas. From matte to sheer and everything in between, having a selection allows you to create multiple looks for different occasions.
8 – Lip Tint
The lip tint is a fantastic way to give your lips a splash of color while keeping things natural and effortless.
9 – Lip Stain
When you need your lip color to last all day, a lip stain is important. It’s designed to leave a lasting tint on your lips, though it can be drying, so pairing it with a balm is a good idea.
10 – Lip Gloss
Include a lip gloss in your kit for extra shine and fuller-looking lips. They come in various levels of pigmentation, so you can go from a natural sheen to a bold statement.
11 – Lip Brush
For precision application, a lip brush is a must. It helps in blending the lip liner and applying lipstick more accurately, especially if you’re mixing shades or working on a more intricate lip look.
12 – Tissue
Tissue can be required to help set the lipstick, before applying the second coat.
13 – Translucent Powder
You may use translucent powder over the first coat of lipstick, which will give you a long-lasting effect.
14 – Concealer
You may need a Concealer to clean up the edges and perfect your lip shape. This will give you a sharp and professional finish.
15 – A Makeup Remover
Always have a gentle makeup remover at hand to correct any mistakes without irritating your skin or removing all your base makeup.
16 – Practice
Lastly, practice makes perfect. Experiment with different textures and colors to find what works best for you and to refine your application technique.
With these essentials, you’re well on your way to mastering the art of lip makeup. Remember, the key to professional-looking lip makeup is not just in the products you use, but also in the care you take in preparing your lips and the skills you develop over time.
How to Put on Lip Makeup Like A Pro: Step By Step
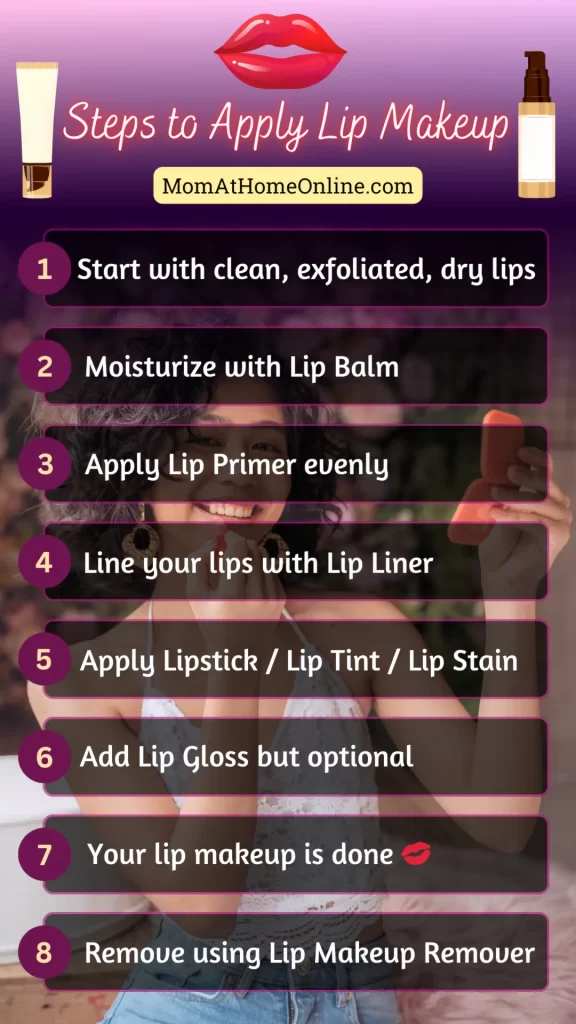
Applying lip makeup like a pro doesn’t have to be daunting. With the right tools and techniques, you can achieve a flawless lip look that will last all day. Here’s a step-by-step guide to help you master the art of lip makeup
1 – Exfoliate Your Lips
Start with a clean canvas by gently exfoliating your lips to remove any dead skin cells. Exfoliating your lips is a simple process that can leave them feeling soft and smooth, as well as, helping your lip makeup go on smoother and last longer. You can create your DIY lip scrub using ingredients like a mix of olive oil and sugar or honey and sugar, or you may opt for store-bought options for convenience.
Steps
- Apply a warm, moist towel over your lips for a few seconds to soften the skin.
- Take a homemade or store-bought scrub to gently massage your lips in a circular motion with your finger or a soft toothbrush.
- Exfoliate for about a minute,
- Rinse off the scrub with warm water.
- Pat your lips dry.
This routine can be done once or twice a week to maintain smooth, healthy lips. It’s important not to over-exfoliate, as this can lead to soreness or capping.
2 – Hydrate
Once you’ve exfoliated, apply a hydrating lip balm or petroleum jelly to moisturize. Hydrating your lips is a simple yet essential routine to maintain your health, especially in extreme weather conditions. Use a high-quality lip balm that contains ingredients like beeswax, shea butter, or coconut oil, which help to lock in moisture and protect your lips from the elements. Additionally, try to avoid licking your lips, as saliva can strip them of their natural oils, leading to further dryness. For added protection, use a Lip Balm with SPF during the day to shield your lips from harmful UV rays.
Steps
- After exfoliating, drink plenty of water throughout the day, as hydration starts from within.
- If you’re using a stick balm, gently twist the tube to expose a small amount of the product.
- Swipe the balm across your bottom lip first, then your top lip, ensuring even coverage.
- If you’re using a pot or jar, use a clean finger or a lip brush to apply, dabbing a small amount onto your lips and spreading it evenly.
- After application, press your lips together to distribute the balm more evenly.
- For those using tinted balms, apply with precision to avoid coloring outside the lipline
- Finally, if you plan to wear a lipliner or lipstick, let the balm absorb for a few minutes before applying color on top.
If your lips are particularly dry or chapped, applying a generous layer of lip balm to soothe and repair the skin is crucial. Remember, a little goes a long way, so no need to over-apply. This routine can be done a few times a week to maintain smooth, healthy lips.
3 – Prime
Applying Lip Primer is a simple yet essential step in your makeup routine, especially if you’re aiming for a flawless lip color application that lasts. The goal is to create a smooth, matte base that will help prevent feathering and improve the longevity of your lipstick or lip gloss. For best results, choose a lip primer that complements your skin tone and the type of lip product you’ll be using. Some primers come tinted, which can enhance or neutralize the natural color of your lips, while others are clear.
Steps
- After moisturizing take a small amount of lip primer—usually, a pea-sized amount is sufficient.
- Apply the primer directly to your lips with your fingertip, a lip brush, or the applicator that comes with the product, depending on your preference.
- Gently spread the primer across your lips, making sure to cover the entire lip area without going outside your natural lip line.
- If the primer is in a stick form, you can apply it as you would a regular lip balm, ensuring you cover the whole lip surface evenly.
- Once applied, give the primer a minute or two to set before moving on to your lip color because this waiting period allows the primer to create a tacky surface that grips onto the lip color, helping it to stay put throughout the day.
With these steps, your lips are primed for perfection, ready to showcase a stunning, long-lasting lip look. Remember, a lip primer is not the same as a lip balm; it’s specifically designed to prepare your lips for makeup and may contain ingredients that help fill in fine lines and prevent the lip color from bleeding.
4 – Line Your Lips
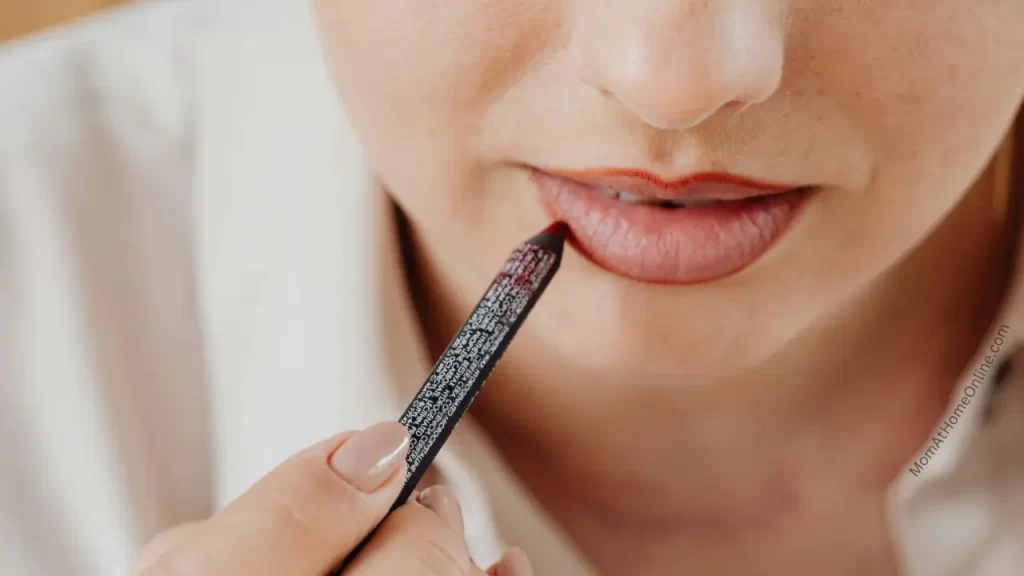
Applying Lip Liner is an art that enhances the shape and wear of your lipstick. This creates a boundary that prevents color from bleeding and enhances the longevity of your lipstick.
Steps
- After priming your lips choose a lip liner that closely matches your lip color or is one shade darker.
- Sharpen your lip liner for precision.
- Outline your natural lip line starting from the cupid’s bow, moving towards the corners of your mouth.
- Fill in the lips with the liner to create a base for your lipstick, which can help prolong its wear.
- For a fuller look, slightly overline your lips, but be careful to keep it natural.
- Blend the liner with a brush to soften harsh lines, giving a more seamless transition to lipstick.
You can experiment with different shades and combinations of lip liners to create different looks and moods. To make your lips look more attractive and defined, you need to pay attention to the color of your lip liner and how it matches your lipstick or gloss. Remember, practice makes perfect, and soon you’ll be lining your lips like a pro!
5 – Apply Lipstick
Applying lipstick enhances the beauty of your lips and complements your overall makeup look. For a more precise application, consider using a lip brush, especially for bold and dark shades.
Steps
- After outlining and filling your lips with lip liner, when applying the lipstick bullet, begin at the center of your lips and work your way outwards, filling in the color evenly.
- For ultimate precision and control, dab your lip brush into your lipstick, then line and fill in your lips using short strokes.
- After applying, blot your lips with a tissue to remove any excess product and to help set the lipstick.
- For a long-lasting effect, you can apply a thin layer of translucent powder over the first coat of lipstick, as this technique helps to seal the color and extend its wear.
- Then apply a second coat.
- Check for any smudges.
- Clean up the edges with a small brush dipped in concealer for a neat, sharp, and professional finish.
Experiment with shades and finishes to find the perfect match for your style and occasion. With practice, you’ll master the technique of the perfect pout every time and confidently rock any lipstick color you choose.
You may apply Lip Tint or Lip Stain instead of lipstick. Here is the difference quoted from L’Oréal Paris USA
“These two lippies are similar in look, but they do have some major differences in terms of wear. A Lip Tint adds a wash of color to your pout that you can easily wipe away. Lip tints are often lightweight and sheer in coverage. A Lip Stain has a lightweight texture that absorbs into the skin to temporarily stains your lips and lasts for much longer. It also feels weightless on the lips but if you try to wipe it off with a tissue, you won’t have much luck.”
How To Use Lip Stain and Lip Tint to get that trendy Post-Popsicle Look By Reece Andavolgyi (Jun 28, 2023)
6 – Lip Tint
The Lip Tint is a versatile beauty product that enhances the lips with a splash of color, often providing a glossy, moist finish. Typically available in liquid or gel varieties, it comes in several styles such as sheer, matte, and buildable. The sheer version offers a subtle hint of color that can be layered, while the matte type accentuates the natural hue of the lips. Compared to traditional lipstick, lip tint generally has a lighter pigmentation.
Steps
- After lining and filling your lips with lip liner, start by dotting a small amount of product onto the center of your lower lip.
- Using the applicator or your fingertip, blend the tint outwards.
- Fill in the rest of your lips.
- For a more intense color payoff, you can build up the tint with additional layers until you reach your desired intensity.
- Once you’re happy with the application, give your lips a gentle press together to ensure even coverage.
Remember, if you’ve gone a bit too bold, you can blot your lips with a tissue to lift off some of the product and reapply. So go ahead, experiment with colors and styles, and cuddle the lasting beauty of lip tints!
7 – Lip Stain
Lip Stain combines the smooth application of a cream with the non-shine finish of matte lipstick, offering a unique waxy feel. On the other hand, lip stain colors the lips with a water or gel formula that sinks the skin, leaving a lasting color as it dries and the liquid component is absorbed. This results in a durable, smudge-proof hue that enhances the natural beauty of your lips.
Steps
- After the application of lip liner, start in the center of your upper lip and work your way out, following the contours of your mouth.
- Glide the applicator across your bottom lip.
- If your lip stain comes in a jar, you might need a lip brush for more precise application.
- After applying the first coat, blot your lips with a tissue.
- Apply a second coat for more intensity and longevity.
Remember, the key to perfect lip stain application is patience and practice. Don’t rush the process, and take your time to perfect each step. With these tips, you’ll be able to rock a beautiful, long-lasting lip color that stands out in any crowd.
8 – Add Lip Gloss (Optional)
Lip gloss is the ultimate finishing touch that adds dimension and shine to your lips. You can wear it alone for a subtle, dewy look or layer it over lipstick which is perfect for a natural daytime look. If you want to feel extra glam, opt for a lip gloss infused with shimmer or glitter particles for a dazzling effect.
Steps
- After applying lipstick or lip stain choose a gloss that complements your skin tone and overall makeup look.
- For a more precise application, use a lip liner to define the edges of your lips before applying the gloss.
- When you’re ready to apply, start at the center of your lower lip.
- Use the applicator to glide the gloss outward to the corners.
- If you prefer a subtle shine, dab a small amount of gloss in the center of your lips and press them together.
- For a bolder look, apply a full sweep of gloss to the bottom lip and press your lips together.
- Spread the gloss evenly.
- After application, check the edges for any smudging.
- Clean up with a tissue or cotton swab if needed.
With these steps, your lips will have a luscious, glossy finish that’s perfect for any occasion. Avoid applying too much product, which can make the gloss look goopy or uneven. Remember, less is often more with lip gloss; a thin layer can give a beautiful sheen without being sticky.
9 – Lip Makeup Remover
It’s important to choose the right type of makeup remover for your lips. Options like micellar water, oil cleansers, and even petroleum jelly are popular choices. Micellar water removes dirt and oil with water, hydrating agents, and surfactants. Oil cleansers dissolve impurities with lightweight oils like jojoba, coconut, or olive. Petroleum jelly removes lipstick residue by melting excess color.
Steps
- Depending on your chosen makeup remover, take a clean cloth, cotton ball, or pad.
- Take a warm washcloth if you use an oil cleanser.
- For an oil cleanser, apply a small amount to dry skin, massage in circular motions, rinse with cold water, and gently wipe off any excess with a warm washcloth.
- If using micellar water, dampen a cotton pad with the solution and press it against your lips for about a minute before gently dabbing it across your lips.
- With petroleum jelly, apply it to your lips and let it sit for a few minutes before wiping it off with a cotton pad or paper towel.
- If you have stubborn lip color pigments lingering, exfoliate your lips with a gentle lip scrub to remove them
- After all the makeup has been removed, it’s crucial to apply a lip balm to hydrate your lips and prevent them from drying out.
Remember, the key to removing lipstick is patience and gentleness. Rough scrubbing can lead to dry and damaged lips, which is the last thing anyone wants. So take your time, and your lips will thank you for the tender loving care.
Some Additional Tips
With these lip makeup steps and techniques, you’re ready to create a signature lip look that reflects your unique style. Here are some additional tips to keep in mind:
- Balance is Key: If your eye makeup is dramatic, opt for a softer lip color, e.g., a nude lip can be perfectly complemented by a bold smoky eye.
- Don’t Be Afraid to Experiment: Play around with different colors and finishes to find what flatters you most.
- Confidence is the Best Makeup: Ultimately, the most important ingredient in any makeup look is confidence, so carry your perfectly painted pout with pride!
Once you’ve mastered the fundamentals, you can delve into more advanced lip makeup techniques, such as the Gradient lip and the Ombré effect.
- The Gradient Lip: This trendy technique involves applying a darker shade in the center and a lighter shade on the edges.
- The Ombré Effect: This technique does the opposite, contrasting the inner and outer parts of your lips, with a lighter shade in the center and a darker shade on the edges.
Conclusion
So it is clear that achieving the perfect lip makeup requires a combination of preparation, technique, and attention to detail. By following the steps outlined above, including exfoliating, hydrating, priming, lining, applying lipstick or lip stain, and adding gloss if desired, you can create a stunning lip look that enhances your natural beauty and complements your overall makeup style.
Remember to choose products that suit your skin type and preferences, and don’t be afraid to experiment with different colors and finishes until you find what works best for you. With practice and confidence, you’ll be able to rock a flawless lip look that turns heads and leaves a lasting impression. So go ahead, unlock your creativity, and let your lips do the talking!
Frequently Asked Questions (FAQs)
How often should I exfoliate my lips?
It’s recommended to exfoliate your lips once or twice a week to maintain smooth, healthy lips, but be careful not to over-exfoliate.
What lip products are essential for a complete makeup kit?
Essential lip products include lip balm, lip primer, lipstick, lip liner, and lip gloss, each serving a unique purpose in achieving flawless lip makeup.
Can I use lip tint instead of lipstick for a more natural look?
Yes, lip tint provides a subtle wash of color to the lips while maintaining a natural appearance, perfect for those seeking a minimal makeup look.
How do I remove stubborn lipstick stains?
Stubborn lipstick stains can be effectively removed with micellar water, oil cleansers, or petroleum jelly, followed by gentle exfoliation and hydration.
Is it necessary to use a lip primer before applying lipstick?
Using a lip primer before lipstick application is recommended as it creates a smooth base, improves lipstick longevity, and prevents feathering.
Question for you
- What’s your on-the-go lip product for achieving a natural, everyday look?
Please feel free to share your answer in the comment box below.
Thank you for reading this blog post. I hope you found it informative and useful. I would love to hear your thoughts and opinions on this topic. Please leave a comment below and share your feedback, suggestions, questions, or anything else you want to say. I appreciate your support and engagement.
Author
Co-founder of Mom At Home Online, MBA (HR, Marketing), Blogger, Content Creator, Ex-Representative of Avon Beauty Products, Ex-Private Tutor, Experienced Music Teacher with 2 Diplomas, Trained Yoga Enthusiast, Movie Lover, and Traveler. Read more about us…
Last Modified Date:
